1.17.2011

No-Knead Bread. The Project

IMG_0775.JPG

Baking bread is in my blood, or at least it is in my family. My earliest memories of my Grandfather were coming down the steps in his house in Montreal to the smell of yeast.  The house would be warm due to the oven that had been on keeping the rising dough warm and the yeast in it happy.  My grandfather and sister, the early risers in the family, would have been already up for hours, making the sponge, adding flour to make it into dough, and then putting it in a bowl, on top of the oven to let it rise.  My grandfather would put the bowl under a paper bag, to create a warm, yeast friend microclimate.  They must have felt right at home it because his bread turned out every time.  Rye bread, whole wheat loafs, baguettes, you name it, he could probably make it.  While my youthful palate didn't quite appreciate the flavor of rye bread, I did love the days he would make baguette.

After recently reconnecting with an old friend who has taken up bread making, I decided to give the whole experience another try.  If you recall, I tried to make bread last winter, during the blizzard that hit D.C.  While it tasted just fine I was disappointed with how it came out.  I didn't think it rose enough and it was a little dense for my taste.  I was discouraged after devoting so much time to one recipe that I put my professional baking aspirations aside.  There is something to be said about being able to make your own bread-  a certain connection to your past that you can to reconnect with.  I suppose going to the store and buying bread is more convenient now.  Practice makes perfect so I am refueling my mission to make good, moist bread, if anything but to carry on a family tradition.  Thoroughly impressed that my friend had mastered the technique must have stirred my competitive spirit and I decided I would give his recipe a try.  Turns out it is a recipe for no-knead bread.  No muscles needed for this kind. Time, and lots of it, you do need though.

The basic concept is the following. Take flour, a little bit of yeast, water and salt, mix it together and let it do what it would do naturally.  Rise.  The bread requires less yeast because it will multiply for hours and hours (12-18 hours to be exact) instead of just 2-3. Once dough is bubbly, place it on a towel and let it rise a little bit more.  Put it in the oven and it's done.  It sounded almost too easy so I had to try.  Twice.  My first attempt was in my Dupont Circle apartment.  The bread tasted fine but I thought I should try again.  The second try was in my sister's Capitol Hill apartment in Seattle.  Outcome: tasty!

My friend sent me the original recipe that he found in the New York Times in 2006 by Jim Lahey.

Jim Lahey's No -Knead Bread

as published in the New York Times on November 8, 2006

and as found in My Bread -The Revolutionary no-wor, no-knead method by Jim Lahey with Rick Flaste

3 cups all-purpose or bread flour, more for dusting ¼ teaspoon instant yeast 1¼ teaspoons salt Cornmeal ( I used semolina flour)

1 5/8 cups water

(NOTE: Who calls for 5/8 cups of water? I think it would be less confusing to the mathematically challenged to say 1/2 cup and then more if needed)

Directions:

In a large bowl combine the flour, yeast, salt and water.  Stir it well until it is all incorporated.  Cover the bowl in plastic wrap and let it sit in a warm place for 12-18 hours.  You'll know the dough is ready (when the yeast has played around, flirted, and reproduced).  The dough will be bubbly and darker.

IMG_0657.JPG

First try- Dupont Circle

IMG_0741.JPG

Second try - Seattle

When the dough looks right, or you have gone to sleep, woken up, ran a few errands and finally have come back to check on your dough, lay out a clean dish towel and sprinkle the cornmeal (white flour, whole wheat flour, semolina flour) on the towel.  Gently take the dough out of the bowl and shape it into a ball.  The dough will be surprisingly sticky.  It's loose and sticky and I found was very hard to actually shape into a ball.  I passed it from hand to hand, each time extracting the free hand as if it had been covered in Nickelodeon slime.  After deciding if you can ever get this blob was to resemble a ball, put it seam down onto the floured cloth.

IMG_0682.JPG

Sprinkle it with more semolina flour and cover it with a second clean towel.  Let it rise for about another 2 hours until it doubles in size.  My dough never doubled.  I was counting the squares on the tea towel and it only increased about 2 more squares.

IMG_0743.JPG

30 minutes before the bread is done, preheat the oven to 450 degrees.  Put a heavy cast iron pot in your oven.  Le Creuset pots are perfect for this I have found.  When you are done waiting around for your dough to rise and want to get on with your day (yes, that's right), carefully take the now very hot pot out of the open, take the lid off and carefully "plop" the dough into the pot, seam side up.  This seam will create a beautifully delicious crack on the top crust of your bread.  Put the lid back on and put it back in the oven for 30 minutes.  When the time is up, take the lid off the pot and put it back in the oven for 15-30 minutes.  I found that you definitely need the full 30 minutes.

IMG_0760.JPG

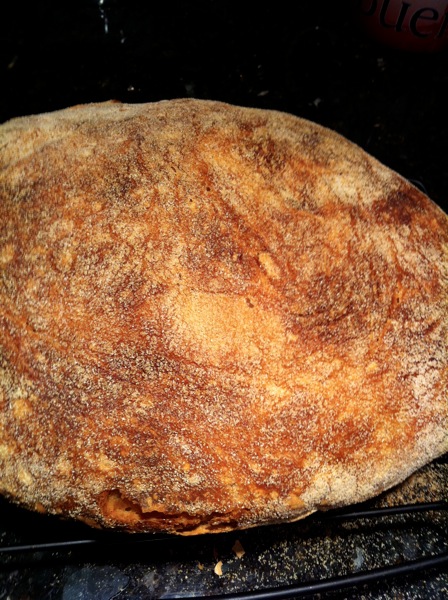
When it's done, take it out of the pot with a spatula.  Be sure not to crack or break the crust because the bread is still baking with steam inside.  Let it cool for about an hour before you can eat it.
IMG_0328_2.jpg

IMG_0688.JPG

IMG_0692.JPG

First try - Dupont Circle

IMG_0774.JPGIMG_0775.JPGIMG_0777.JPGSecond try - Seattle

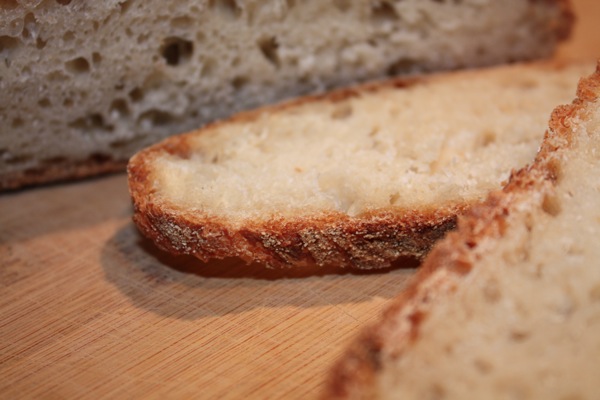
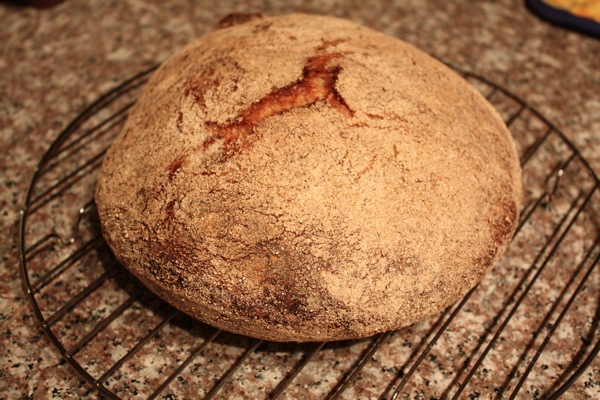
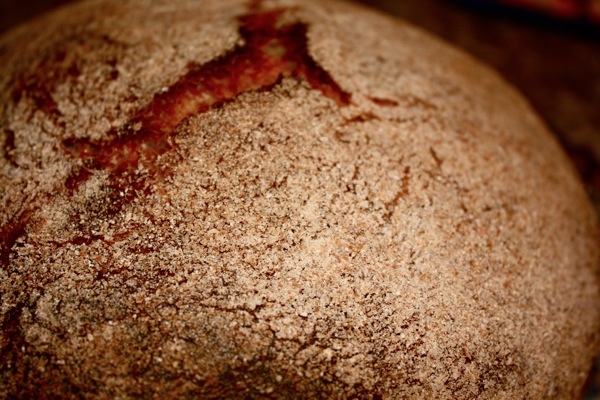
The second try was definitely more of a success than the first.  I think this is partly because I turned the heat in my apartment way down in DC.  I can't sleep with heat blowing in my face all night and since the dough rose overnight in my 62 degree kitchen for the first attempt, I don't think the yeast was quite as happy as it could have been.  The second attempt was in a baby-friendly apartment, that was kept quite a bit warmer than mine was.  The bubbles in the bread were larger.  Note to self- overheat at night for the sake of your bread.  The crust the second time around was also a lot better.  The inside was light and fluffy and almost had a tangy taste to it.  The crust was deliciously crunchy.  The bottom was nice and dark and almost stuck to my teeth when I bit down into it.  I love this kind of bread.  I have the best memories of sitting in various cafes, eating moist bread that has crust that sticks to your molars.

I consider this bread a success!  It tastes a lot better than anything I can buy at my local Safeway and is a lot cheaper than anything I can find at Whole Foods, if you don't count man hours.  I will continue this bread project, hoping to perfect the recipe above and tweaking it slightly.

...and who doesn't like a "tartine" on homemade bread in the morning?

IMG_0781.JPG


12.18.2010

A baby shower and Hickory Farms Feast

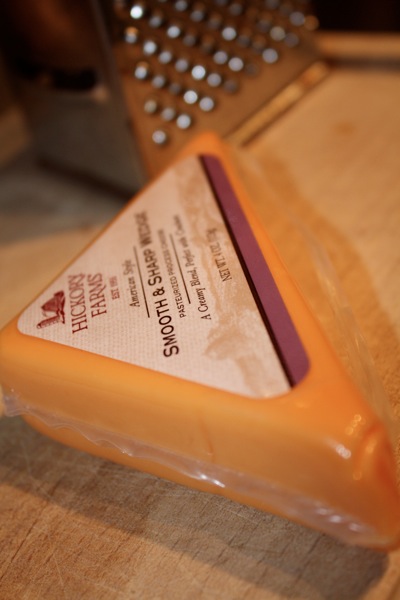
Not long ago, I came home from a very long day and found 2 boxes in front of my door.  Not expecting anything I was really excited!  I opened them to find 2 boxes FULL of Hickory Farms crackers, cheeses, mustards and different kinds of sausage. What fun!  I had completely forgotten that I had signed up to be part of the FoodBuzz Tastermaker program.  You get to sign up and test out products from different food related companies.

The boxes were so FULL and I knew there was no way I could eat that much cheese.  I was in need of a party-  a party with lots of people who liked cheese.  I tried to get together with some of my girlfriends but work and life got so busy this season that plans fell through. Thankfully, I had another party I could bring them to.  A baby shower!  My sister and brother in law are having a baby!  They live in Seattle, pretty far from Washington, D.C., but I was able to skip out of town during the busy holiday season last weekend for her shower.

IMG_0544.JPG

As I suppose is expected for Seattle in December, it rained pretty much the entire weekend.  It rained a relatively hard, warm rain called "the pineapple express".  I thought that was just the name of a movie but as it turns out it is also what a storm coming from Hawaii is called.

What do two sisters do when it's raining?  Bake!  We make gingerbread "little boy and little girls" and my grandfather's famous cheeseballs.  I usually publish all my recipes but my grandfather's cheeseball recipe has to stay in the family.  I'm sure if you search cheeseball you can find a recipe that is pretty close to what we used.  Cheese (sharp cheddar preferably), flour, mustard powder and butter.  That's it!  Shred it, mix it and chill it.  Just like cookie dough.


IMG_0523.jpgIMG_0524.jpg

The Hickory Farm cheese grated nicely and definitely made great cheeseballs!

IMG_0525.JPG

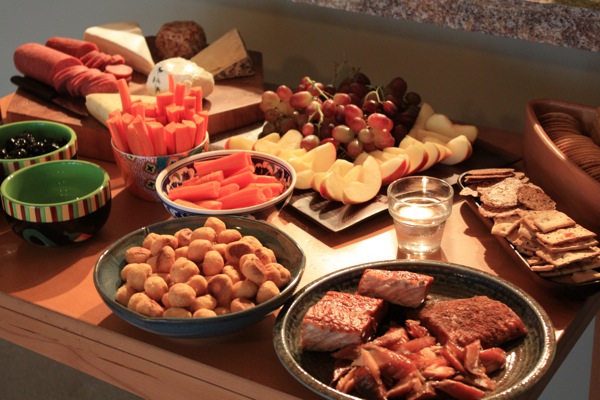
Check out the savory spread we had!  Homemade cheeeseball, gingerbread boys and girls.  Humus, olives, carrot sticks, Hickory Farms summer beef and turkey sausage, cranberry and regular mustard, AMAZING northwest salmon that my brother in law's mother brought.. and other goodies!

IMG_0543.JPGIMG_0538.jpgIMG_0532.JPG

Look at the adorable cucakes my brother in law's mother made!  She even brought the great cupcake stands!


(tag cute monkey flower arrangement in the background)

IMG_0533.jpg

IMG_0585.JPGIMG_0588.JPG

Despite the rain we all had a great time!  It's hard to go wrong with cupcakes, cheeseballs and humus.


The holiday parties are wrapping up at the restaurant which now gives me time to think about parties at my house!   I hope everyone is having a great holiday season!


12.04.2010

Plum Brandy Finale- bottling!

IMG_0515.JPG

Three months really do fly by!

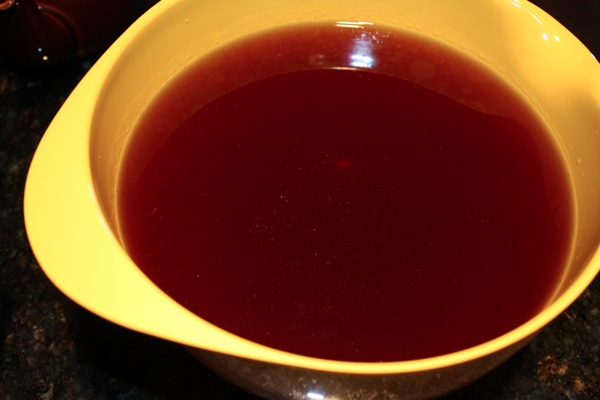
When I started my plum brandy project back in September, winter, the holidays and cold weather were all just a foggy memory left over from last year.  For some reason it's hard to remember what wool sweaters and gloves feel like when there is a seemingly perpetual mugginess in the air.  With work and life at full speed, the September heat and humidity quickly turned into a December chill.  While I was surviving the October event rush at the restaurant, my plums were gently befriending the brandy they were swimming in.  While we celebrated Thanksgiving and watching the leaves turn colors, the cinnamon stick and vanilla bean were enveloping the fruity flavors with a warm spicy tone.  Now that country has begun its unusually long holiday celebration, it's time to bottle and taste what has been working away all these months.

IMG_0508.JPG

After gently rocking the large jar back and forth one more time to make sure all the flavors were evenly distributed before they are poured into their own individual bottles, take a ladle and gently remove the swollen plums and put them in a separate bowl.  I am freezing mine to make "brandied plum sorbet or ice cream!  The cinnamon stick has opened up and looks more like the bark that it really is than a dried spice.  The vanilla pod, completely saturated with juice and brandy oozes out its precious seeds.  I took it and put it in a jar with sugar to make vanilla brandy sugar.  I just couldn't bring myself to throw away the pod.  The fruit, stick and pod look pretty, glistening with all the sugars that have been marinating for several months.

IMG_0509.JPGI bought small bottles online, washed them out and then poured boiling water into them to make sure to kill anything that might have called them home in the store.  This isn't the boiling that is necessary to can or jar but I the alcohol in the bottles will kill anything else.

IMG_0511.JPGDon't these bottles all lined up remind you of the Jean Paul Gaultier ad for his cologne  Maybe it's just me.

http://cdn2.ioffer.com/img/item/157/303/289/6lbJLCASocK8Cek.jpgsource: http://www.ioffer.com/si/fragrances
Strain the brandy to remove any bits of plum that might be floating around.

The mixture won' t be completely clear unless you use cheesecloth (which I do not have) but that's ok.  It will taste the same.

IMG_0510.JPG

Pour the mixture into the bottles that have dried and cooled off by now, label them, and you are done! Unless you plan to spend MANY nights watching movies and drinking brandy, these dark red bottles can makes great gifts for your family and friends


IMG_0514.JPG

IMG_0517.jpg

Spiced winter brandy for the cold months to come.

10.17.2010

Plum brandy update and poached pears

The long days at work are far from over which leaves very little time for baking and cooking.  Thankfully I have a recipe working away even while I'm not at home.  My plum brandy is happily marinating away in the corner of my dining room, getting sweeter and fruitier every day.  I opened up the jar the other day to taste my progress and, what a difference!  The almost harsh brandy taste is almost completely gone.  It now tastes like delicious, sweet, spicy, smooth, and fruity brandy.  All that after only a few weeks!  I can only imagine what this will taste like in December (by which time I'm sure I'll have decided I have waited long enough and will want a real taste).  Some of the plums have kind of lost their color which can only mean that they are not only graciously giving their flavor to the brandy but also donated their beautiful purple color.
IMG_0473.JPG


IMG_0475.jpg

Along with my other farmers' market purchases I also bought pears.  If you give me an apple and a pear I will usually reach for the apple.  For some reason the crispy crunch you get from an apple is simply more satisfying to me than the grainy nature of a pear.  One way I do like pears though, and I feel almost silly saying this, is poached in wine.  After all, who wouldn't agree with me on that one?  I was watching a show called French Food at Home about a woman who "quit the corporate life and moved to Paris to learn how to cook" (how lovely...) and watched her make an incredibly simple poached pear recipe that I just had to try.  This recipe takes a while but couldn't be easier.  Not only its flavors completely embody fall and makes you look like an accomplished cook, it fill your house or apartment with an amazing mulled wine smell.
IMG_0458.JPG
Poached Pears in Wine
from French Food at Home on Cooking Channel
Ingredients:
(4) Bosc pears
(1) bottle of red wine
1/2 cup of honey

Directions:


Pick 4 pears (or like in my case 3) that are relatively firm.  You don't want them falling apart while cooking in the wine.  Peel them but keep the stems on.
Pour the bottle of red wine you have selected into an oven proof baking dish that has a cover on it.  Le Creuset pots are perfect for this.  Turn the heat of your stove onto medium and mix in the honey and let it melt into the wine.  I used less than 1/2 a cup, more like 1/4 cup.  I don't love really sweet desserts and figured the pears would have plenty of sugar.  (NOTE: here you could add spices like cinnamon sticks, or star anise, a vanilla bean maybe?)  Add your peeled pears.  The wine should only cover them about half way.  That's OK.  You will turn them every hour or so, so they absorb the wine equally and evenly.
IMG_0460.JPG
Turn the heat up until the wine starts to boil.
IMG_0464.jpg
Put the pot, with the lid/cover on, into your oven, set at 250 degrees.  The temperature is very low but you will be cooking the pears for anywhere from 3-5 hours so you don't want it too hot.
I cooked mine for 3 hours, turning the pears every hour.  By the time they were done their naked white bodies had turned a beautiful burgundy red.
Remove the pears and put the pot of wine back on the stove.  Turn the heat up to high and let the mixture boil until it had reduced by more than half.  It should be a dark red syrup when you are done.
Drizzle it over the pears and enjoy.


IMG_0477.JPGIMG_0477.JPG 
IMG_0478.JPG
IMG_0480.jpg

The sweet syrupy wine is just so incredibly good.  I have some leftover and I am trying to figure out what else I could drizzle it on because throwing it away seems like a shame.  Any ideas?

10.10.2010

Farmers' Market and Comfort Food

I am in serious need of comfort food.  October is one of the busiest months for me at the restaurant.  Everyone who was away for the summer, relaxing on their decks or patios with friends, are now booking dinner at the restaurant.  Companies that had vacated DC for the summer are back at work and throwing cocktail parties and business dinners.  It's as if Washingtonians feel bad for deserted us during July and August and feel like they need to make it up to us.  Great for business but utterly exhausting.  After an unavoidably hard week I needed comfort food and fast - something warm and satisfying. -something that reflects the season.  I headed out to the farmers' market to get inspired.
IMG_4184.jpg
Grape kiwis? Never heard of them.  They kind of smelled like kiwis.  So cute!  You apparently eat them whole, no peeling necessary.
IMG_4182.jpg
I buy my eggs from this woman every Sunday.  I'm not sure if I can really taste the difference between these and the ones you would get at the store but appart from it being more fun I just like thinking that my eggs came from happy chickens on her farm.  She reuses the egg cartons too.
IMG_4185.JPG
Twin Springs is my go-to fruits and vegetable stand.  I used to go to their Bethesda location on Saturdays when I lived there.  I feel a sense of loyalty to them and their prices are very reasonable.
IMG_4186.jpg
I guess other people like them too!
IMG_4188.JPG
IMG_4189.JPG
IMG_4192.JPG
IMG_4193.JPG
It's dahlia season!
IMG_4196.JPG
How beautiful are these variegated beans and eggplant
IMG_4197.JPG
IMG_4202.jpg
I didn't know you could grow ginger this far north.  I assumed it was a tropical plant.  Wrong again!
IMG_4201.jpg
OK these aren't from the farmers' market.  They were hanging off the plant growing in front of my building but it was so colorful I thought I'd take a picture!  When did we decide that fall colors were represented by fall foliage?  The farmers market is bursting with pinks and purples and bright greens!
I ended up coming home with butternut squash, a LOT of apples, a few pairs, apple cider and some brussels sprouts.  Now what to make.....?
When it comes to comfort I think is stews and soups.  Since it was in the 70s this week (the last warm spell of the year I'm sure) I wasn't quite ready for a stew so I went with soup.  Butternut squash and apples are a pretty classic combination for soup.  I've been craving pizza from Delancey ever since I had it Seattle this summer.  The owner of the restaurant started out writing a food blog so I thought I'd check it out for a recipe.  Success!


Butternut Squash and Apple Soup
adapted from Orangette
Ingredients:

¼ cup olive oil ( I used just a couple tablespoons)
1 2-lb butternut squash, peeled, seeded, and cut into 2-inch pieces (about 4 cups)
2 flavorful apples, preferably Gala, peeled, cored, and cut into 2-inch pieces (about 2 cups)- ( used 3 apples.  They just looked so good.)
1 large onion, peeled and coarsely chopped (about 1 cup) ( I'm sure she was calling for a white onion but I used a red onion for its sweetness and color)
¾ tsp curry powder ( I didn't have curry powder so I used some cumin and paprika instead)
¾ tsp ground mace ( I used nutmeg which is pretty close)
½ tsp ground cardamom
1 cup good-quality apple cider (I had some from the farmers' market)
1 quart chicken stock (vegetable works fine as well) ( I used vegetable bouillon cubes. I know I should have my own stock... if I just had the time to make it)
I wanted to add a little spice so a I added a few pinches of Espelette pepper.  It's a mild chili pepper flake cultivated in France.  It adds just enough spice to give the soup a little kick without making it really spicy.

Directions:
IMG_0456.jpg
Peel and cut the butternut squash and apples (that I both bought at the farmers' market!  Market use #1!!) into cubes and add them to a large pot along with the onion. "Saute" them, more like steam them, until the onion starts to turn translucent.  Add the spices, the cider  (that I bought at the market!  Use #2!!!) and the vegetable stock and cook away, about 40 minutes, until the squash is nice and tender.  Honestly that's about it.  That's what's great about soups.  Once you do all the chopping it's really up to the pot and heat to do their job and meld all the ingredients.
Carefully ladle the cooked vegetables and broth into a food processor or blender and pulse it until it becomes smooth.  Remember to do this in small batches because hot liquids will create pressure in the blender and rise to the top quickly.
When you are ready to eat it you could put a little dollop of creme fraiche or fromage blanc in the middle or eat it as it is. Yum.


IMG_0469.JPG

Food, for me, can really wipe away whatever it was that I was thinking about or worrying about.  The act of chopping and cutting and measuring and stirring relaxes me and eating the final product is so satisfying.  This easy soup was just what I needed after my long week.  One day off and on to the next one!
***

Last Sunday I tried to make chocolate caramels from a cookbook my Italian chef friends gave me...and failed miserably.  It was probably because the instructions were in Italian.  I can understand a good 50% of what I hear and read but 50% just doesn't cut it when it comes to baking and confectionaries.  Out of failure comes success though.  I had a lot of leftover cream so I made butter!

I started out by shaking the cream in an empty 1/2 gallon milk jug.  By the time it got to whipped cream consistency it really got too hard for me to shake.  I must be seriously lacking in upper body muscle.  I transferred my whipped cream to the mixer and let it finish the job.

IMG_0455.JPG
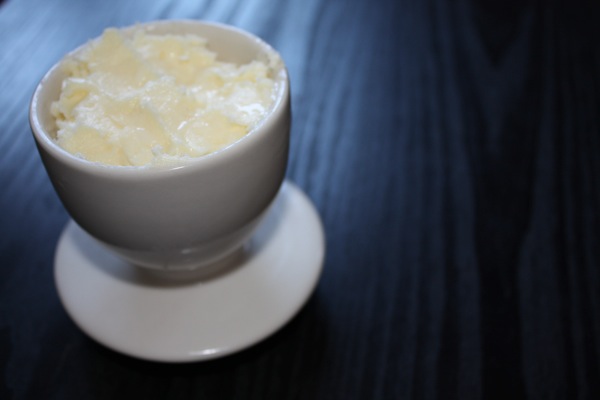
Butter in my butter bell for my morning toast this week