Showing posts with label comfort food. Show all posts

9.26.2012

Can it!

We're going to go ahead and ignore the fact that I haven't posted in over a year.  I have no good excuses, but here are some bad ones. Maybe it was laziness, maybe it was lack of inspiration, maybe it was that I had too many other things going on in my life. Work has been busy, as usual. I signed up, more like my sister and father convinced me to sign up for, the Marine Corps Marathon at the end of October.  Marathons as it turns out, take a lot more training and time commitment than half marathons do. I've also been redecorating my apartment, slowly.   Now that it's a bit cooler, and darker a LOT earlier, I have a feeling I'll be at home cooking more.  I'm back at it!

I took a mini staycation this summer, to get away from work and my routine.  The first half of the week belonged to me and what I wanted to do.  The second half of the week belonged to Puerto Rico- a tropical recharge if you will.  I've read countless books about eating locally, eating off the land, only eating what is in season, and canning.  While I shop at my local farmer's market as much as I can, and just signed up for winter CSA box from Smucker's Farms, I've never tried to can/jar seasonal items for winter eating and cooking.  My mini staycation was the perfect opportunity to get hot and steamy in the kitchen with some fruits and vegetables.

IMG_2085.JPG

I may have been a little ambitious but this was my plan: peach jam, cherry jam, dilly beans, picked jalapeno slices, and crushed tomatoes. Ready?

Go can it!

Day 1:

Figure out what exactly I just got myself into.

Work out the kinks (overflowing boiling water onto the stove sent me into a panic)

Dive into it... peach jam, crushed tomatoes and jalapeno slices.

Every book on canning and jarring has a chapter on the proper sanitization of your canning jars, and rightfully so.  No one wants to experience what the books say will happen to you should you get a bad batch due to bacteria growing in your jars.  It's kind of like driver's ed and the crash videos, or sex ed and the STD class.  "Can at your own risk". I probably over boiled every jar I used but better safe than sorry! Wear your seatbelt! While I gathered inspiration from several books, I mainly used Canning for a new Generation. My aunt gave it to me and it had by far the best selection of recipes and tips. I also used Put 'Em Up! for inspiration.

When planning for this, I thought I wanted to try different combination of flavors for the jams.  It being my first try, simple ended up being the way to go.  Once I master the technique I can play around with the flavors.
IMG_2030.JPG

Classic Peach Jam

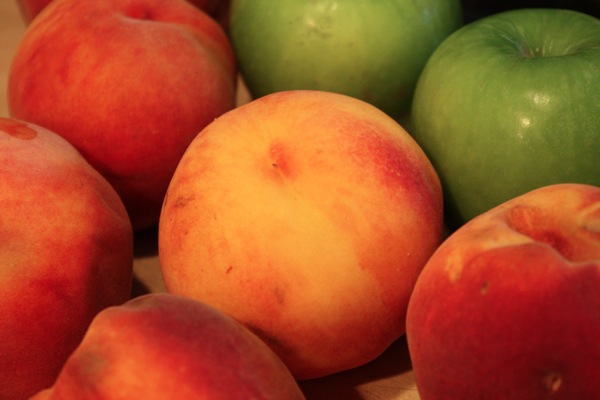
12 ounces of Granny Smith apples (about 2 large)

4 pounds of peaches, peeled, pitted and diced

2 cups of sugar

3 tablespoons strained fresh lemon juice

Prep your kitchen counter:

(1) clean cloth to place the sterilized jars on when they come out of the water bath

(1) clean cloth to put the finished and VERY hot jam jars on to sit for a while

Line up your canning utensils:

Tongs

Jar lifter (to handle hot jars)

lid lifter (with a magnet)

funnel
IMG_3407.jpg

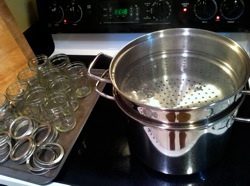
Prepare the water-bath for canning:

While you will have to do this step each and every time you start a new recipe, I like that the book reminded you to start the process at the beginning.  Repetition repetition, repetition. It's good for beginners.

Sterilize the jars and keep them hot in the canning pot, put a small plate in the freezer and put the flat lids in a heat proof bowl.

*Cut the apples into quarters and core them.  The recipe calls for putting the seeds and cores into a cheesecloth bag. I didn't have one so I used little teabags that my sister gave me from a tea store at Pike's Place market.  ( I also used these little bags to infuse simple syrup for my Early Grey Pound Cake).  You're supposed to put loose tea in them but they can play double duty in this case.

IMG_2033.JPG

SO FAR: Apples are cut up, seeds and cores are in cheesecloth, jars are boiling away and bacteria is dying.

* Put the peaches and sugar into a 6-8 quart preserving pan (I wasn't about to go out and buy a lot of equipment to do this, other than the necessary stuff, so I used a big cast iron pot as my preserving pot).  Bring to a simmer, stirring frequently, and cook until the juices cover the peaches.
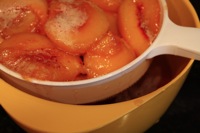
IMG_2037.JPG

Pour the cooked peaches into a colander, collecting the peach juice in a bowl. Stir the peaches gently to release all the juices. Pour collected juices back in the preserving pot and add the apples and apple core cheesecloth- bring to a boil over high heat.  (From what I gathered, the apples bring the pectin that will "jellify" (yes that's a technical term) the jam in the end.  You can omit the apples and use 'pectin in a pouch' but I thought going all natural was the best way.) Boil, stirring occasionally, until the juice thickens and reduces.  About 15 minutes.

Return the peaches and any accumulated juices back into the preserving pot, add the lemon juice, and bring to a simmer.  Stir frequently until the peaches are very tender and falling apart.  The recipe says is it done when you put a small dab of the jam on the plate that was in the freezer and it becomes firm after a minute of being put back in the freezer.  I forgot to do this.  Rookie mistake.  It ended up fine.

IMG_2044.jpg

Remove from the heat and stir for a few minutes to distribute the fruit in the liquid.  Remove the cheesecloth and the apples.  While I was able to find and remove the apple skins, there were no apples to be found.  They had all disintegrated into the jam.  I think it's fine but I wonder why the recipe thought I would still be able to find them.

SO FAR: Jam is basically finished, your jars have been sterilized and are happily bubbling away in your steaming stockpot full of water. Your lids are still not sterile.

*Ladle boiling water from the canning pot into the bowl with the lids. Using a jar lifter, remove the sterilized jars from the canning pot, carefully pouring the water from each one back into the pot, and place them upright on a clean folded towel. Drain the water off the lids.  Make sure the lids aren't stacked on top of each other or the boiling water won't be able to sterilize the entire area of each lid.  ALSO, don't dunk the lids in the boiling water pot because it's not good for the rubber on them.  Just pour a little bit (I poured the hot water from one of my half pints on top of them) of boiling water on them and let it sit for a bit.

Your jars are clean and drying on the clean cloth.  Carefully ladle the hot jam, through a funnel, into the jars leaving a 1/4 inch headspace at the top. Using a damp paper towel, clean off any jam that might have gotten onto the rim of the jar.  Take your lid lifter (the one with the magnet) and put the lid on, then tighten the ring on. I burnt my fingers here a few times.  Return the jars to the water and boil for 5 minutes to process.

IMG_2046.JPG

Remove from the water.

Those jars will be h-o-t!  With a jar lifter, move the jars from the cloth they are on to another clean cloth where the jars can stay, for 12 hours, undisturbed.

Soon you should hear the jars "pop!".  This means there is a seal and your jars can be kept unrefrigerated.  After an hour, push down on the top of all your jars to make sure there is a seal.  If it there isn't and you can push down on them, put the jar in the refrigerator.

IMG_3408.JPG

Success! You have peach jam.  I haven't tried the finish product only because I haven't stopped admiring them. I'm going to wait a while I think.
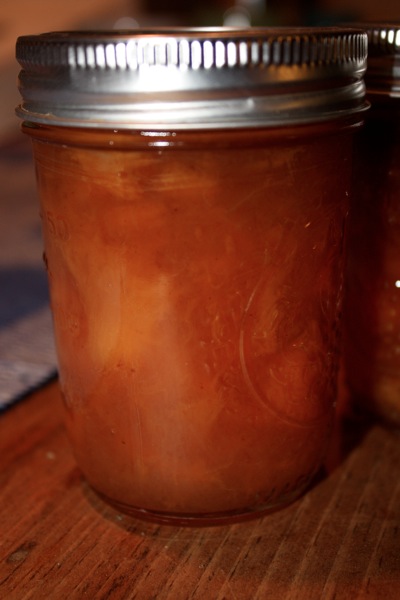
IMG_2089.jpg

To be continued.....

Next up: Canned tomatoes.


10.10.2010

Farmers' Market and Comfort Food

I am in serious need of comfort food.  October is one of the busiest months for me at the restaurant.  Everyone who was away for the summer, relaxing on their decks or patios with friends, are now booking dinner at the restaurant.  Companies that had vacated DC for the summer are back at work and throwing cocktail parties and business dinners.  It's as if Washingtonians feel bad for deserted us during July and August and feel like they need to make it up to us.  Great for business but utterly exhausting.  After an unavoidably hard week I needed comfort food and fast - something warm and satisfying. -something that reflects the season.  I headed out to the farmers' market to get inspired.
IMG_4184.jpg
Grape kiwis? Never heard of them.  They kind of smelled like kiwis.  So cute!  You apparently eat them whole, no peeling necessary.
IMG_4182.jpg
I buy my eggs from this woman every Sunday.  I'm not sure if I can really taste the difference between these and the ones you would get at the store but appart from it being more fun I just like thinking that my eggs came from happy chickens on her farm.  She reuses the egg cartons too.
IMG_4185.JPG
Twin Springs is my go-to fruits and vegetable stand.  I used to go to their Bethesda location on Saturdays when I lived there.  I feel a sense of loyalty to them and their prices are very reasonable.
IMG_4186.jpg
I guess other people like them too!
IMG_4188.JPG
IMG_4189.JPG
IMG_4192.JPG
IMG_4193.JPG
It's dahlia season!
IMG_4196.JPG
How beautiful are these variegated beans and eggplant
IMG_4197.JPG
IMG_4202.jpg
I didn't know you could grow ginger this far north.  I assumed it was a tropical plant.  Wrong again!
IMG_4201.jpg
OK these aren't from the farmers' market.  They were hanging off the plant growing in front of my building but it was so colorful I thought I'd take a picture!  When did we decide that fall colors were represented by fall foliage?  The farmers market is bursting with pinks and purples and bright greens!
I ended up coming home with butternut squash, a LOT of apples, a few pairs, apple cider and some brussels sprouts.  Now what to make.....?
When it comes to comfort I think is stews and soups.  Since it was in the 70s this week (the last warm spell of the year I'm sure) I wasn't quite ready for a stew so I went with soup.  Butternut squash and apples are a pretty classic combination for soup.  I've been craving pizza from Delancey ever since I had it Seattle this summer.  The owner of the restaurant started out writing a food blog so I thought I'd check it out for a recipe.  Success!


Butternut Squash and Apple Soup
adapted from Orangette
Ingredients:

¼ cup olive oil ( I used just a couple tablespoons)
1 2-lb butternut squash, peeled, seeded, and cut into 2-inch pieces (about 4 cups)
2 flavorful apples, preferably Gala, peeled, cored, and cut into 2-inch pieces (about 2 cups)- ( used 3 apples.  They just looked so good.)
1 large onion, peeled and coarsely chopped (about 1 cup) ( I'm sure she was calling for a white onion but I used a red onion for its sweetness and color)
¾ tsp curry powder ( I didn't have curry powder so I used some cumin and paprika instead)
¾ tsp ground mace ( I used nutmeg which is pretty close)
½ tsp ground cardamom
1 cup good-quality apple cider (I had some from the farmers' market)
1 quart chicken stock (vegetable works fine as well) ( I used vegetable bouillon cubes. I know I should have my own stock... if I just had the time to make it)
I wanted to add a little spice so a I added a few pinches of Espelette pepper.  It's a mild chili pepper flake cultivated in France.  It adds just enough spice to give the soup a little kick without making it really spicy.

Directions:
IMG_0456.jpg
Peel and cut the butternut squash and apples (that I both bought at the farmers' market!  Market use #1!!) into cubes and add them to a large pot along with the onion. "Saute" them, more like steam them, until the onion starts to turn translucent.  Add the spices, the cider  (that I bought at the market!  Use #2!!!) and the vegetable stock and cook away, about 40 minutes, until the squash is nice and tender.  Honestly that's about it.  That's what's great about soups.  Once you do all the chopping it's really up to the pot and heat to do their job and meld all the ingredients.
Carefully ladle the cooked vegetables and broth into a food processor or blender and pulse it until it becomes smooth.  Remember to do this in small batches because hot liquids will create pressure in the blender and rise to the top quickly.
When you are ready to eat it you could put a little dollop of creme fraiche or fromage blanc in the middle or eat it as it is. Yum.


IMG_0469.JPG

Food, for me, can really wipe away whatever it was that I was thinking about or worrying about.  The act of chopping and cutting and measuring and stirring relaxes me and eating the final product is so satisfying.  This easy soup was just what I needed after my long week.  One day off and on to the next one!
***

Last Sunday I tried to make chocolate caramels from a cookbook my Italian chef friends gave me...and failed miserably.  It was probably because the instructions were in Italian.  I can understand a good 50% of what I hear and read but 50% just doesn't cut it when it comes to baking and confectionaries.  Out of failure comes success though.  I had a lot of leftover cream so I made butter!

I started out by shaking the cream in an empty 1/2 gallon milk jug.  By the time it got to whipped cream consistency it really got too hard for me to shake.  I must be seriously lacking in upper body muscle.  I transferred my whipped cream to the mixer and let it finish the job.

IMG_0455.JPG
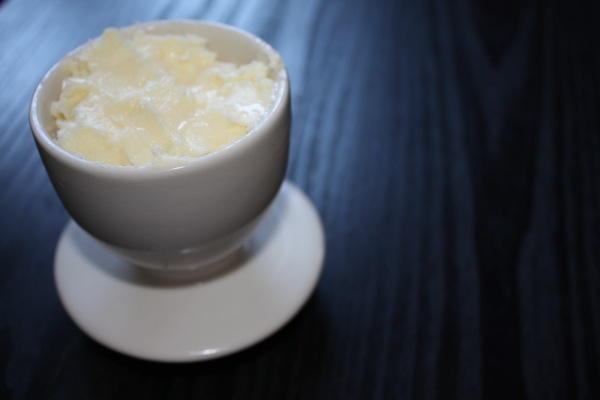
Butter in my butter bell for my morning toast this week

1.31.2010

Easy Chicken Masala and revisiting my knife skills


I suppose I have to thank Bon Appetit Magazine for my weekend of cooking.  A recipe from a while back for yesterday's soup and a DELICIOUS recipe for Chicken Masala from the most recent issue.

I love Indian food but have always been reluctant to try and cook it myself for one reason: so many ingredients!  I got Padma Lakshmi's Tangy Tart Hot and Sweet cookbook a few years ago but have yet to make anything out of it because most of the dishes call for at least 10 ingredients, most of them spices I don't own.  I'm slowly building up my Indian spice repertoire.  Until then, I am relying on spice packets from Whole Foods!  Thankfully that's exactly what the Bon Appetit recipe called for.

Two years ago I took a knife skills class at L'Academie de Cuisine in Bethesda, MD .  I had so much fun, even though I came home with a blister on my right index finger from all the chopping!  In the class they gave us a few chickens to cut up and de-bone.  Usually when I buy whole chickens it's to roast them.  This recipe was a fun excuse to try and cut one up again!

Easy Chicken Masala
as found in Bon Appetit's February 2010 issue

1 cup plain whole-milk yogurt
1/4 cup coarsely chopped cilantro (I left this out... sorry Cilantro lovers)
3 tbs extra virgin olive oil
1 tbs garam masala ( I used a ready mixed bag I bought at Whole Foods but you can also mix your own with the appropriate spices too!)
2 tsp salt
1 large garlic clove ( I used two small ones)
1 4-4 1/2 lb whole chicken (I could only find a 7 lb one so that's what I used)


Directions:
Cut up the whole chicken into 8 pieces.

Next, mix the yogurt, olive oil, garam masala, salt and garlic in a glass baking dish. 

Add the chicken.  Cover it in plastic wrap and refrigerate it at least 2 hours and up until 1 day.

Preheat over to 400 degrees and roast chicken for 45-50 minutes.  I checked mine after 45 minutes and it was almost done... 50 minutes is a good happy medium I think.


This recipe could not have been easier to make. The yogurt made the chicken so moist and the garam marsala gave it such amazing flavor.  Roasting turned the marinade into a caramelized crust.  Yum!!  This is a must try recipe!


Enjoy!


12.19.2009

......Snowed in!

.....Perfect opportunity to relax, cook, bake, and make TWO trips to the grocery store.


There was a threat of snow and having lived in D.C. for most of my life I know that either it won't snow at all or the city will be buried.  Surprisingly we actually got snow...lots of it....over a foot of it actually!

I was supposed to run with my running group this morning at 8:00 AM.  That was canceled.  I get to sleep in!  I was then supposed to work a lunch party at the restaurant.  That was canceled.  I get to relax and have a leisurely breakfast and cook a stew for dinner!  I've been wanting to make a stew for a while for several reasons.  First, I love stews.  For some reason slow cooked meat, vegetable, wine, onions and time just meld together and create something amazing.  Second, it's the perfect dish for my lifestyle right now.  I need something that will keep longer than a day or two, that will get better with time and that I can easily re-heat when I come home late from events.  Stew it is!


To find a receipe I went back to my fool proof chef.  Jamie Oliver.  He is one of my first favorite "celebrity" chef. His recipes are fairly simple, straight forward, classic and delicious.

Jool's Favorite Beef Stew
from
Jamie's Dinners
the essential family cookbook


Ingredients
olive oil
butter
1 onion - chopped
a handful of sage leaves
1 3/4 lbs stewing steak or beek skirt (I used chuck) cut into 2 inch cubes
flour to dust cover the meat in
 2 parsnips, peeled and quartered

4 carrots, peeled and halved
1/2 a butternut squash, de-seeded, and roughly diced 

some small potatoes (I left these out)
2 tbl of tomato puree

1/2 a bottle of red wine 
1 1/4 cup beef broth


Preheat the over to 300 degrees.  Melt the butter and olive oil in your pan then add the onions and sage leaves and let them cook for a bit.  While this is cooking, salt and pepper your beef cubes and lightly cover them in flour (this will thicken the sauce).  
Note: I slightly alerted this recipe for two reasons.  First, I omitted one of the two parsnips because the grocery store only had one.  I guess "snow storm" means "go buy all the parsnips".  I figured this wouldn't change the recipe too much. Second, I had a strawberry blonde moment and bought an acorn squash instead of a butternut squash.  I only realized my mistake when I got home when it was too late.  I just went with it.  While it tasted just fine the acorn squash completely disintegrated in the stew and turned into mush.  The stew tasted GREAT but it didn't look all that pretty.  Next time I'll try it with butternut squash.  
Oops.
Once the meat is floured go ahead and put it in the pot, along with all the chopped up vegetables, the 1/2 bottle of wine, tomato puree (I used tomato paste), beef brother and a little salt and pepper.  Bring it to a boil, cover it


Jamie recommends you cook the stew in the oven for 3-4 hours depending on the size of the chunks of meat and how fresh the meat is.  I cooked it for 2 and a half and I think it was too long.  I wanted there to be more liquid in the stew but most of it was gone by the time I took it out of the oven.  To fix it i added a little more beef broth and it helped.  Just take a peek once and a while and check on your stew.


[Insert text message from the restaurant Maite D'.  My dinner event was canceled. Horray!]  Time to make dough for cookies!


On deck:


Basic sugar cookies to be turned into christmas cookies

and

Ina Garten's Rugelach


1.27.2009

First real snow of the season! That calls for soup.

SNOW!


I woke up this morning to snow falling! Most of the east coast has gotten some sort of snow over the past month and D.C. finally got a taste!

I took a picture when I walked outside to get the paper, and another one when I got home from work. So pretty! All I hear now is freezing rain. It was nice while it lasted.

The first snow of the season clearly calls for soup! What better than TK's seasonally appropriate butternut squash soup. I have a feeling I might be slightly changing some of Bouchon's recipes not out of laziness or level of difficulty but purely on time constraint. Getting home from work at 7:00 does not leave a lot of time to cook. In my defense, I only usually skip the extra little finishing steps. The core of the recipes stay the same. For example, TK's soup calls for finishing with brown butter, nutmeg and creme fraiche. While I'm sure it would be delicious, plain soup hit the spot tonight:)

While the squash cooked...I practiced my chopping skills!

Things always take longer than you think they will.
While the squash cooked...and cooked...and cooked... I cooked, sweat, and simmered the onion, carrots, shallots, and garlic. Let's not forget the bouquet garni! At least it made my apartment smell good! Time for some wine.

After adding the roasted squash, pureeing it.. .it's time to taste!


Yum!


All gone!


Recipe:

my version of Thomas Keller's Butternut Squash Soup (omitting the brown butter, sage and nutmeg creme fraiche)

One butternut squash
2 tbs canola oil
salt and pepper
2 sage springs
1 cup thinly sliced leeks
1/2 cup thinly sliced carrots
1/2 cup thinly sliced shallots
1/2 cup thinly sliced onions
6 garlic cloves
2 tbs honey
6 cups of vegetable stock
bouquet garni (I used parsley, rosemary and sage)

Cut the squash in half, take out the seeds (you can save them and roast them later for a yummy snack). Salt and pepper the squash, rub it with canola oil and stuff a sage stem. Turn them cut side down onto a roasting pan or cookie sheet and bake it at 350 degrees about about an hour (mine too a lot longer, it all depends on the size of the squash).

While the squash is roasting, sautee the onion, carrots, shallots and leeks in a pan. Add the garlic, salt and pepper and sautee on low until soft. Add the vegetable stock, bouquet garni and simmer. Add the roasted squash and simmer for 20-30 minutes to really incorporate all the flavors.

Puree until smooth and eat!

Enjoy!